
Setup a Firewalled Mailcow Instance on Hetzner Cloud
A setup guide for running a firewalled Mailcow environment on Hetzner Cloud.


Mailcow is a containerized all-in-one mail server solution that is built around self-hosting. This guide will go over getting Mailcow running on Hetzner cloud, setting up DNS for Mailcow, setting up your Hetzner Cloud server, and setting up a firewall on Hetzner Cloud to help better secure your Mailcow environment.
Setup a Project in Hetzner Cloud for your Mailcow environment
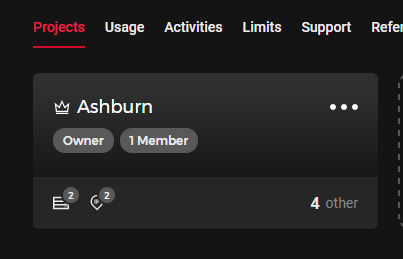
When logged into the Hetzner Cloud Console, under "Projects", select "New Project". Add a name for your project and click "Add Project".
Create a server for your Mailcow environment to live on.
Mailcow, per their minimum requirements, wants at least 6GB of RAM. It's entirely possible to run mailcow with a lot less resources with ClamAV and SOLR disabled. We will go through this later on in the setup. For this example, I'm using a CPX21 instance which will have 3 vCPU and 4GB of RAM. I'll then add 4GB swap file to be safe.
Location: Set the location nearest to you. I'm selecting Ashburn, VA.
Image: I selected Ubuntu 22.04 because it meets the supported Mailcow requirements.
Type: Shared vCPU (Unless you have very heavy usage and requirements)
Networking: Public IPv4 & Public IPv6
SSH Keys: Add your SSH key(s) if you have them ready, otherwise Hetzner will email a root password
Volumes: Not necessary, but if you expect heavy storage requirements, adding a volume for /opt can be strongly beneficial for easy storage scaling if needed.
Firewalls: Not setup yet, we go over creating a firewal in a future step. Skip for now.
Placement groups: N/A
Labels: N/A
Cloud config: N/A
Name: Set a server name. I usually set to match the DNS name for the server.
Select "Create & Buy now"
Create a new firewall and add rules for Mailcow
In the Hetzner Cloud Console navigate to the "Firewalls" tab under your project.
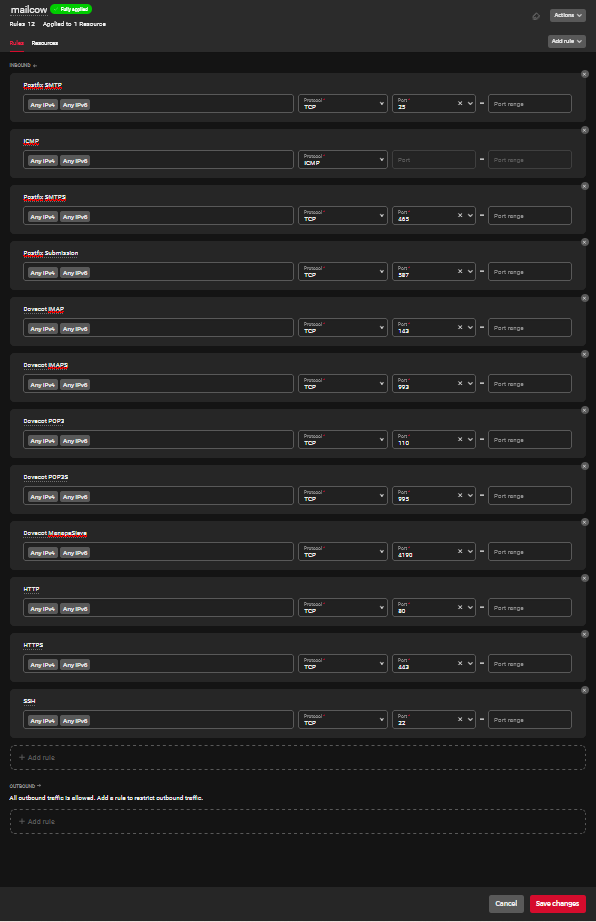
The ports Mailcow uses are listed in the Mailcow Docs page under "Default Ports". See the docs page or reference the screenshot above.
https://docs.mailcow.email/prerequisite/prerequisite-system/#firewall-ports
Apply the new firewall and rules to your vserver
To utilize the Hetzner Cloud firewall for your instance, the firewall needs to be applied to your server specifically. When a firewall is setup it initially has no servers associated to it.
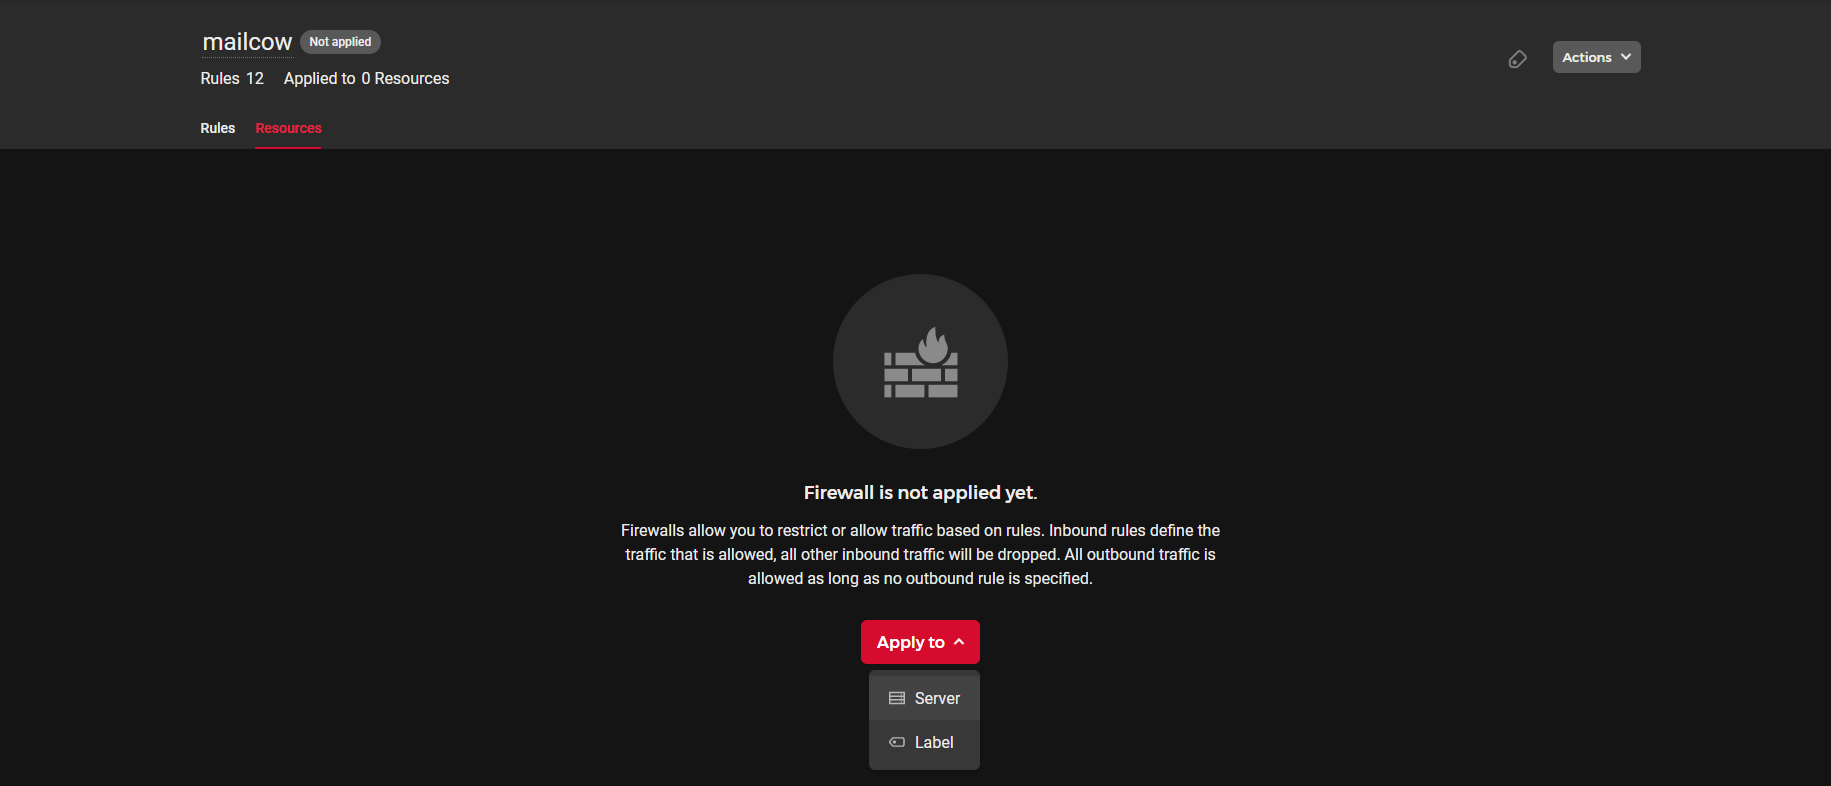
Navigate to the Resources tab of your firewall next to your Rules tab
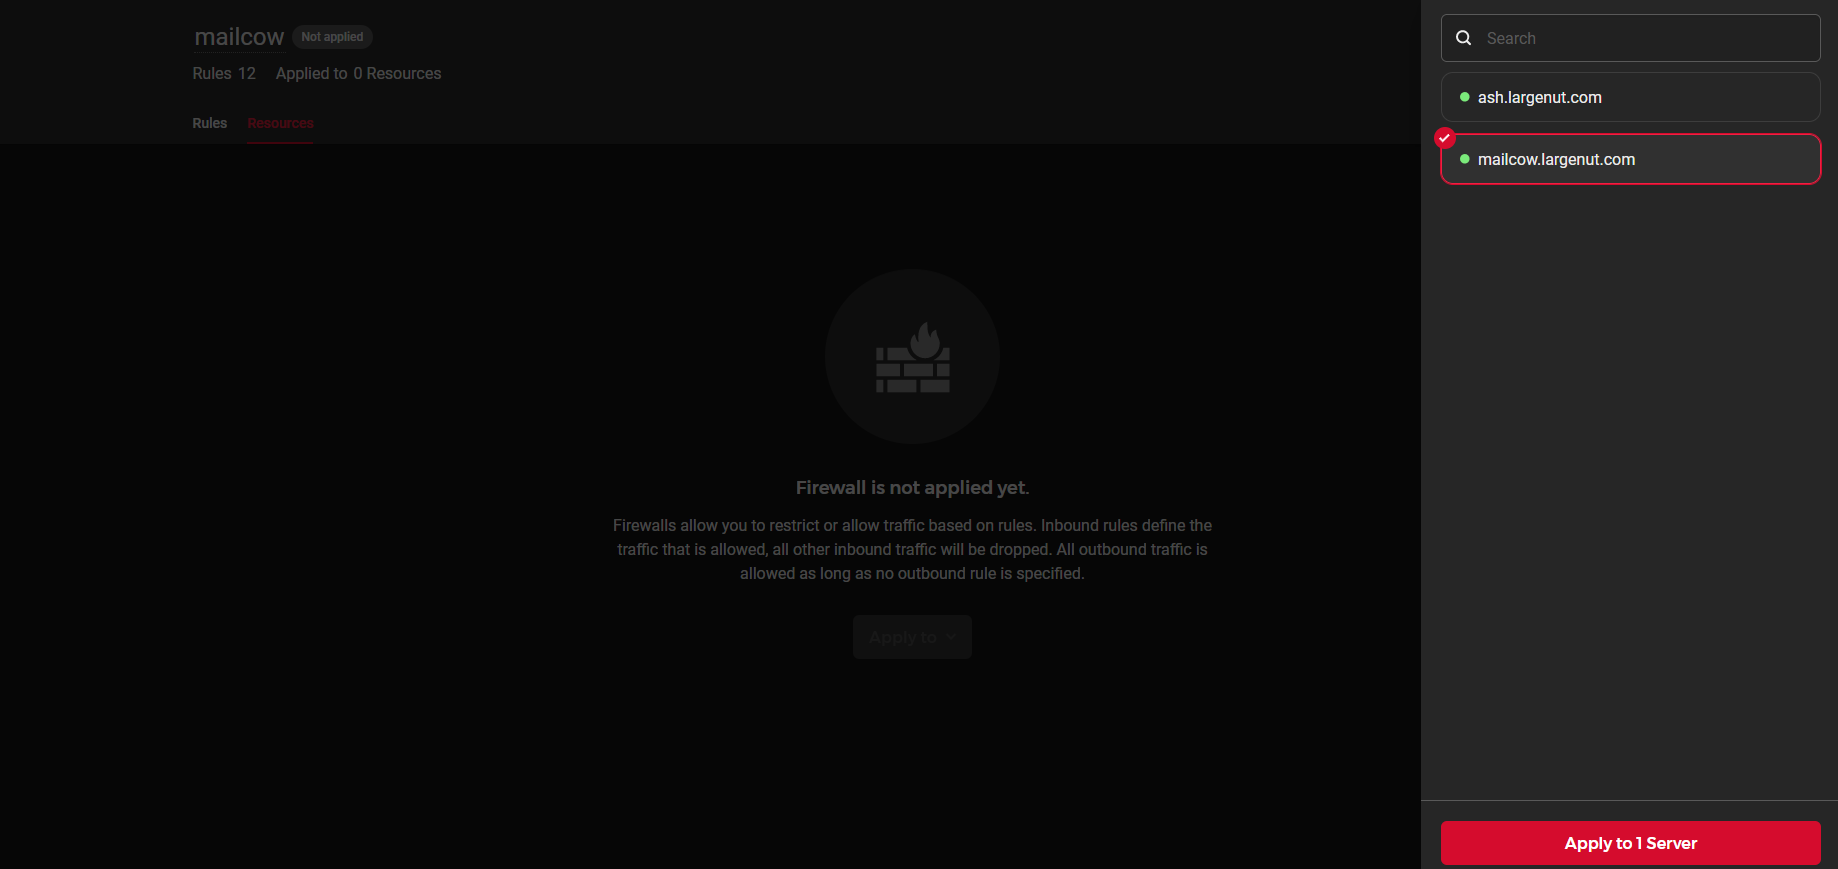
Select your Mailcow server and then click "Apply to 1 Server"
Add DNS records at your DNS provider
Carefully follow the DNS setup instructions provided in the Mailcow Docs. Setup will vary by which provider you use for DNS, but the records will nearly always be the same.


Your new IPv4 and IPv6 subnet information will be located in the "Networking" tab for your server in the Hetzner Cloud Console. Hetzner Cloud usually will assign "::1" as the IPv6 address for your instance.
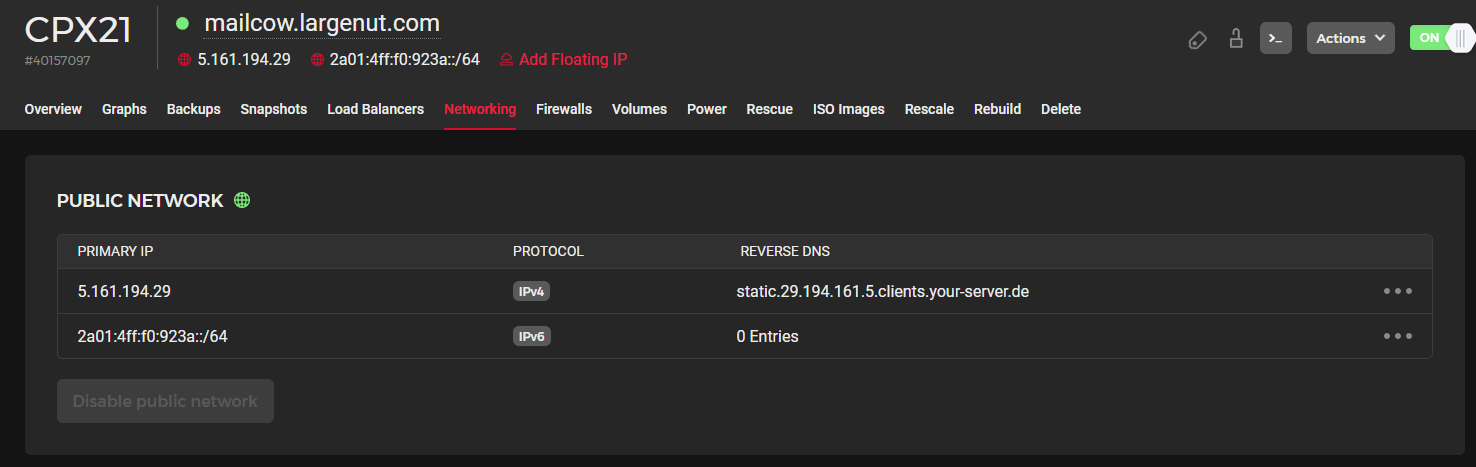
Take note for your mail server CNAME used for your MX record. Since we will be using a dual-stack IPv4 and IPv6 network you will need an A record and an AAAA record for your mail server.

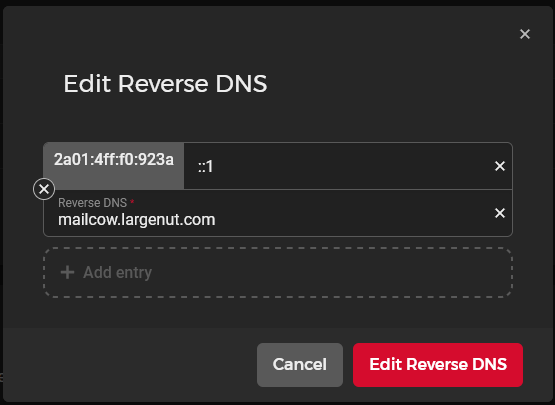
In the example image, my Mailcow hostname is mailcow.largenut.com.
Add the rest of the required DNS records as specified in Mailcow's Docs, then continue onto the next steps.
Configure Reverse DNS (PTR) records
Hetzner makes it easy to setup reverse DNS for IPv4 and IPv6 addresses. This is a hard requirement for mailservers to be deliverable.
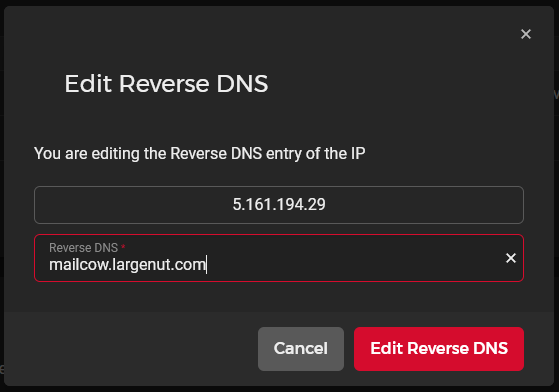
For each IP address under the Networking tab in the Hetzner Cloud Console for your server, select "Edit Reverse DNS"
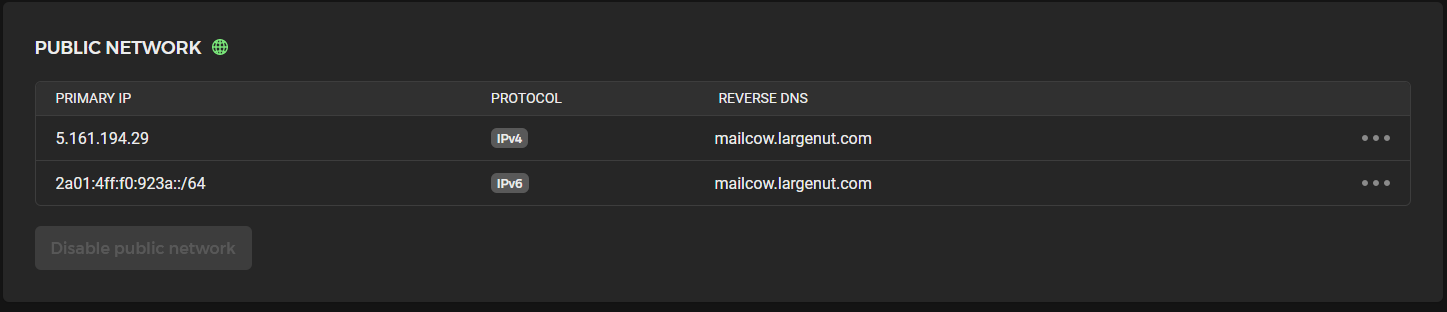
For the IPv4 reverse DNS entry
For the IPv6 reverse DNS entry - Note the address added is "::1". This is the address assigned to the server's network interface automatically.
Verify PTR record using MxToolbox


We can see after a query for both the assigned IPv4 and IPv6 address on our Hetzner Cloud instance, both reverse DNS entries are valid.
Initial login to your Hetzner Cloud server instance
ssh root@<Instance-IP>If you created your instance without adding a SSH key, Hetzner emails a password. Hetzner requires this password to be changed immediately.
You are required to change your password immediately (administrator enforced).Update APT cache and packages
After initial setup from an Image, its good to make sure all packages are up to date before getting started with our setup.
apt-get update && apt-get upgrade -yAdd a swapfile (Optional)
I'm adding a 4GB swapfile to be safe since we're pretty close to the resources Mailcow will consume even when we disable ClamAV and SOLR. I've had a rock-solid stable environment running for years configured this way. This step is optional if you elect to use a server instance without the minimum RAM requirements specified by Mailcow.
root@mailcow:/# fallocate -l 4G /swapfile
root@mailcow:/# chmod 600 /swapfile
root@mailcow:/# mkswap /swapfile
Setting up swapspace version 1, size = 4 GiB (4294963200 bytes)
no label, UUID=cce1eeb1-8fee-4457-a748-c503e566189d
root@mailcow:/# swapon /swapfile
Add a line for your new SWAP to fstab
root@mailcow:/# nano /etc/fstabValidate your SWAP is functional
root@mailcow:/# swapon --show
NAME      TYPE SIZE USED PRIO
/swapfile file   4G   0B   -2

root@mailcow:/# free -h
               total        used        free      shared  buff/cache   available
Mem:           3.7Gi       246Mi       1.8Gi       3.0Mi       1.7Gi       3.2Gi
Swap:          4.0Gi          0B       4.0Gi
root@mailcow:/#
We can see the SWAP space is available and enabled.
Setup docker environment
apt-get update
apt-get install curl
curl -fsSL https://get.docker.com -o get-docker.sh
sh get-docker.sh
If this quick setup doesn't fit your environment, check out https://docs.docker.com/engine/install/.
Clone Mailcow GIT repository and begin Mailcow setup
cd /opt
git clone https://github.com/mailcow/mailcow-dockerized
cd mailcow-dockerized
Generate the initial Mailcow config file. You'll specify yout hostname, timezone, and confirm which branch you'll use for updates. I use the stable branch.
root@mailcow:/opt/mailcow-dockerized# ./generate_config.sh
Found Docker Compose Plugin (native).
Setting the DOCKER_COMPOSE_VERSION Variable to native
Notice: You´ll have to update this Compose Version via your Package Manager manually!
Press enter to confirm the detected value '[value]' where applicable or enter a custom value.
Mail server hostname (FQDN) - this is not your mail domain, but your mail servers hostname: mailcow.largenut.com
Timezone [Etc/UTC]:
Which branch of mailcow do you want to use?

Available Branches:
- master branch (stable updates) | default, recommended [1]
- nightly branch (unstable updates, testing) | not-production ready [2]
Choose the Branch with it´s number [1/2]
Fetching origin
Already on 'master'
Your branch is up to date with 'origin/master'.
Generating snake-oil certificate...
.......+.....+.+..............+.+......+......+..+.......+........+.+..+++++++++++++++++++++++++++++++++++++++++++++++++++++++++++++++++*....+...+..+...+.+.....+.+..+.............+..+.+......+...+...+++++++++++++++++++++++++++++++++++++++++++++++++++++++++++++++++*.......+......+.+..+................+..+...+....+........+....+...+...............+........+.......+...............+.....+.+............+...+.....................+.....+...+.............+........+........................+.+..+...................+......+...+...........+...............+.+........+....+......+...........+.+..+.......+...+..+...+..........+........+...+.+.........+.....+.+......+.....+..........+..+......+..........+...............+...............+..+..........+.........+......+..............+...............+......+.......+..+.........+......+...+..........+........+..........+..+.+.....+++++++++++++++++++++++++++++++++++++++++++++++++++++++++++++++++
...........+....+.....+...+...+.......+.....+.+..+............................+..+++++++++++++++++++++++++++++++++++++++++++++++++++++++++++++++++*.......+..+...+....+.....+....+..+...+.+..............+......+....+......+.....+...+...+..........+..+......+.+.....+....+.........+..+.+.....+.........+...+.+.....+....+......+............+.........+........+.+..+.......+...........+......+....+.....+......+.+...+..+.......+++++++++++++++++++++++++++++++++++++++++++++++++++++++++++++++++*......+..+......+.........+..................+..........+...............+...+.....+...................+......+............+.........+....................+....+.....+.+......+.....+..................+......+.............+..+................+..+...+.......+...........+..........+..+.........+......+.......+..+.+.................+.+..+....+...........+....+......+..............+....+.....+........................+...+...+......+................+...+......+...+............+........+.......+.....................+...+..............+............+.+............+...+..+...+.......+............+...+............+...............+.....+.+.....+...+....+...........+....+......+.........+....................+.+..............+.......+........................+...........................+...............+.........+.....+......+...+.........+...+...+.......+..............+.+..+...+.......+.................................+............+.....+................+.....+....+...+.........+......+...+..+....+......+.....+.........+....+.....+.........+............+.........+.+...+........+...+.......+.........+.....+.+..............+...................+.....+.......+..+.+..+.........+....+.........+......+..+.........+................+...+..+....+...........+...+..........+.................+....+...+........+............+...+...+....+...........+.......+.....+.........+.+.........+++++++++++++++++++++++++++++++++++++++++++++++++++++++++++++++++
-----
Copying snake-oil certificate...
Detecting if your IP is listed on Spamhaus Bad ASN List...
Check completed! Your IP is clean
root@mailcow:/opt/mailcow-dockerized#
Disable ClamAV and SOLR (Optional)
This step is to save on RAM. If you elected for a higher SWAP or an instance with more RAM, you won't need to do this.
Mailcow's Docs go over the process here:
"ClamAV and Solr can be greedy with RAM. You may disable them in mailcow.conf by settings SKIP_CLAMD=y and SKIP_SOLR=y"
root@mailcow:/# cd /opt/mailcow-dockerized
root@mailcow:/opt/mailcow-dockerized# nano mailcow.conf
...
# Skip ClamAV (clamd-mailcow) anti-virus (Rspamd will auto-detect a missing ClamAV container) - y/n
SKIP_CLAMD=y
# Skip SOGo: Will disable SOGo integration and therefore webmail, DAV protocols and ActiveSync support (experimental, unsupported, not fully implemented) - y/n
SKIP_SOGO=n
# Skip Solr on low-memory systems or if you do not want to store a readable index of your mails in solr-vol-1.
SKIP_SOLR=y
...mailcow.conf
Bring your compose project up
cd /opt/mailcow-dockerized
docker compose up -d
root@mailcow:/opt/mailcow-dockerized# docker compose up -d
[+] Running 20/20
✔ Network mailcowdockerized_mailcow-network Created 0.1s
✔ Container mailcowdockerized-olefy-mailcow-1 Started 0.0s
✔ Container mailcowdockerized-memcached-mailcow-1 Started 0.0s
✔ Container mailcowdockerized-solr-mailcow-1 Started 0.0s
✔ Container mailcowdockerized-sogo-mailcow-1 Started 0.0s
✔ Container mailcowdockerized-dockerapi-mailcow-1 Started 0.0s
✔ Container mailcowdockerized-unbound-mailcow-1 Healthy 0.0s
✔ Container mailcowdockerized-redis-mailcow-1 Started 0.0s
✔ Container mailcowdockerized-php-fpm-mailcow-1 Started 0.0s
✔ Container mailcowdockerized-clamd-mailcow-1 Started 0.0s
✔ Container mailcowdockerized-mysql-mailcow-1 Started 0.0s
✔ Container mailcowdockerized-dovecot-mailcow-1 Started 0.0s
✔ Container mailcowdockerized-postfix-mailcow-1 Started 0.0s
✔ Container mailcowdockerized-nginx-mailcow-1 Started 0.0s
✔ Container mailcowdockerized-acme-mailcow-1 Started 0.0s
✔ Container mailcowdockerized-ofelia-mailcow-1 Started 0.0s
✔ Container mailcowdockerized-netfilter-mailcow-1 Started 0.0s
✔ Container mailcowdockerized-rspamd-mailcow-1 Started 0.0s
✔ Container mailcowdockerized-watchdog-mailcow-1 Started 0.0s
✔ Container mailcowdockerized-ipv6nat-mailcow-1 StartedAll Mailcow containers came up on the first try.
Your Mailcow environment should automatically request Let's Encrypt SSL certificates if DNS is setup properly in the initial steps. This can take a few minutes to occur. We can check the logs of the ACME container to see if anything went wrong:
docker logs mailcowdockerized-acme-mailcow-1We can see ACME requesting a missing certificate in this case:
Tue Dec  5 00:19:11 UTC 2023 - Using existing domain rsa key /var/lib/acme/acme/key.pem
Tue Dec  5 00:19:11 UTC 2023 - Using existing Lets Encrypt account key /var/lib/acme/acme/account.pem
Tue Dec  5 00:19:11 UTC 2023 - Detecting IP addresses...
Tue Dec  5 00:19:12 UTC 2023 - OK: 5.161.194.29, 2a01:4ff:f0:923a::1
Tue Dec  5 00:19:12 UTC 2023 - Validated CAA for parent domain largenut.com
Tue Dec  5 00:19:12 UTC 2023 - Found AAAA record for mailcow.largenut.com: 2a01:4ff:f0:923a::1 - skipping A record check
Tue Dec  5 00:19:12 UTC 2023 - Confirmed AAAA record with IP 2a01:04ff:00f0:923a:0000:0000:0000:0001
Tue Dec  5 00:19:12 UTC 2023 - Certificate /var/lib/acme/mailcow.largenut.com/cert.pem missing or changed domains 'mailcow.largenut.com' - start obtaining
Tue Dec  5 00:19:12 UTC 2023 - Copying shared private key for this certificate...
Tue Dec  5 00:19:12 UTC 2023 - Checking resolver...
Tue Dec  5 00:19:12 UTC 2023 - Resolver OK
Tue Dec  5 00:19:12 UTC 2023 - Using command acme-tiny   --account-key /var/lib/acme/acme/account.pem --disable-check --csr /var/lib/acme/mailcow.largenut.com/acme.csr --acme-dir /var/www/acme/
Login to your Mailcow instance
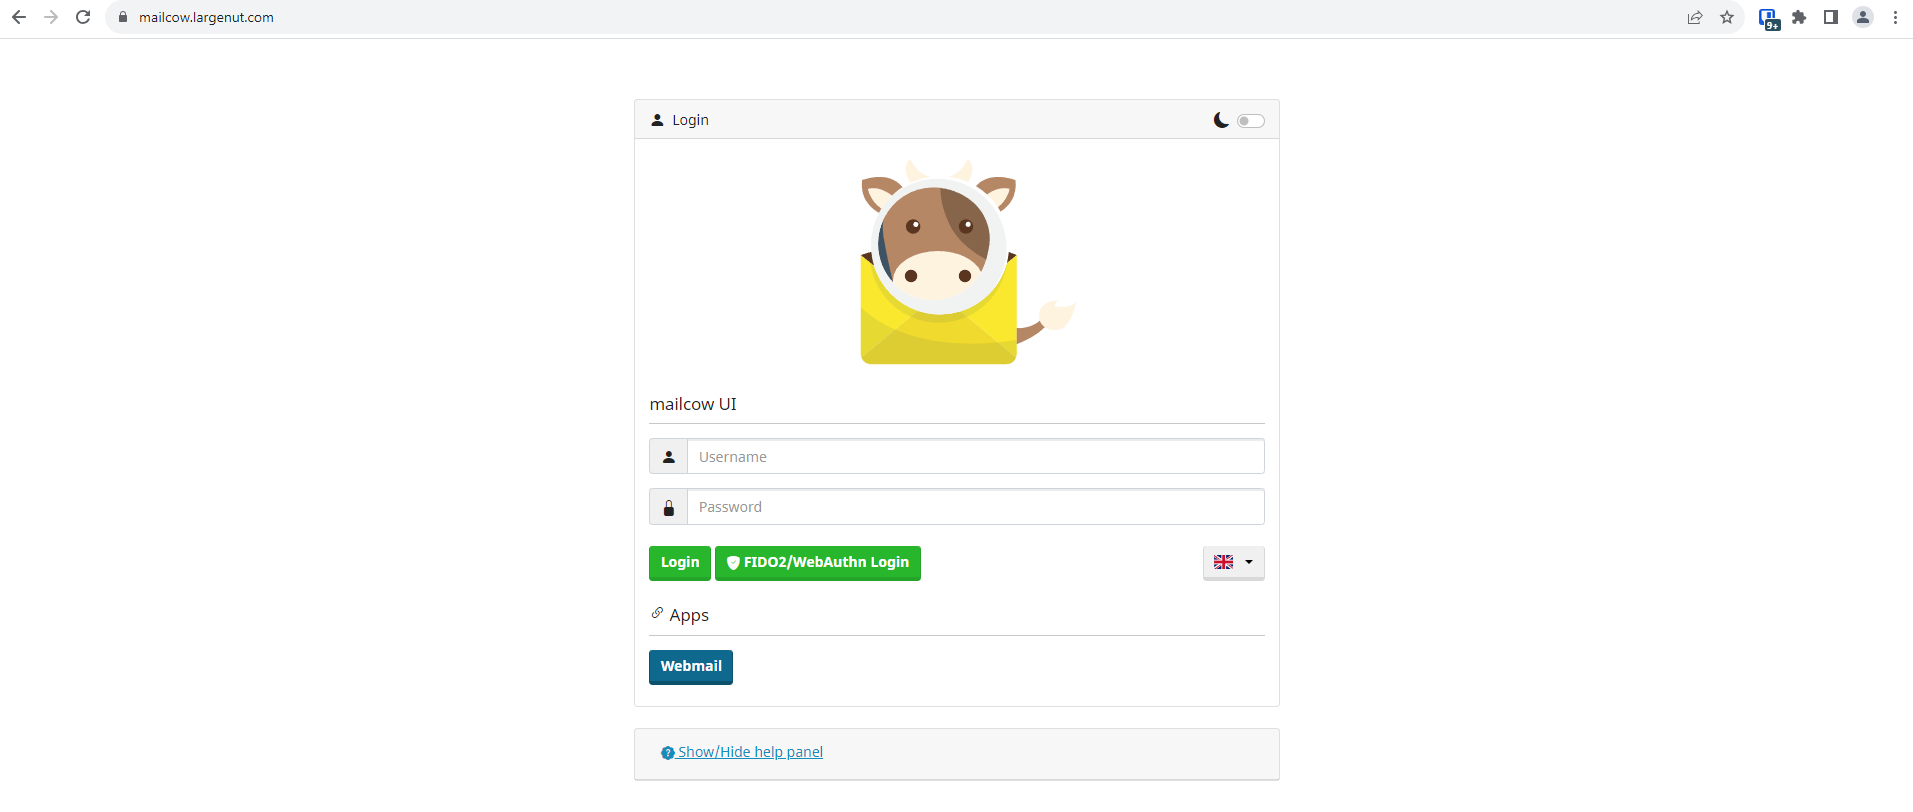
Mailcow should be available at your DNS hostname. The default credentials will be:
Username:admin
Password: moohoo
Change your default admin password
Login with the default credentials > System > Configuration:
Select "Edit" for the "admin" account. Set a new password.
Optional: Change default admin account name
Optional: Set 2 factor authentication for the admin account
Ready to go
Mailcow should be running and firewalled on Hetzner cloud. The environment should be up, accessible, and ready for you to add domains and mail accounts.